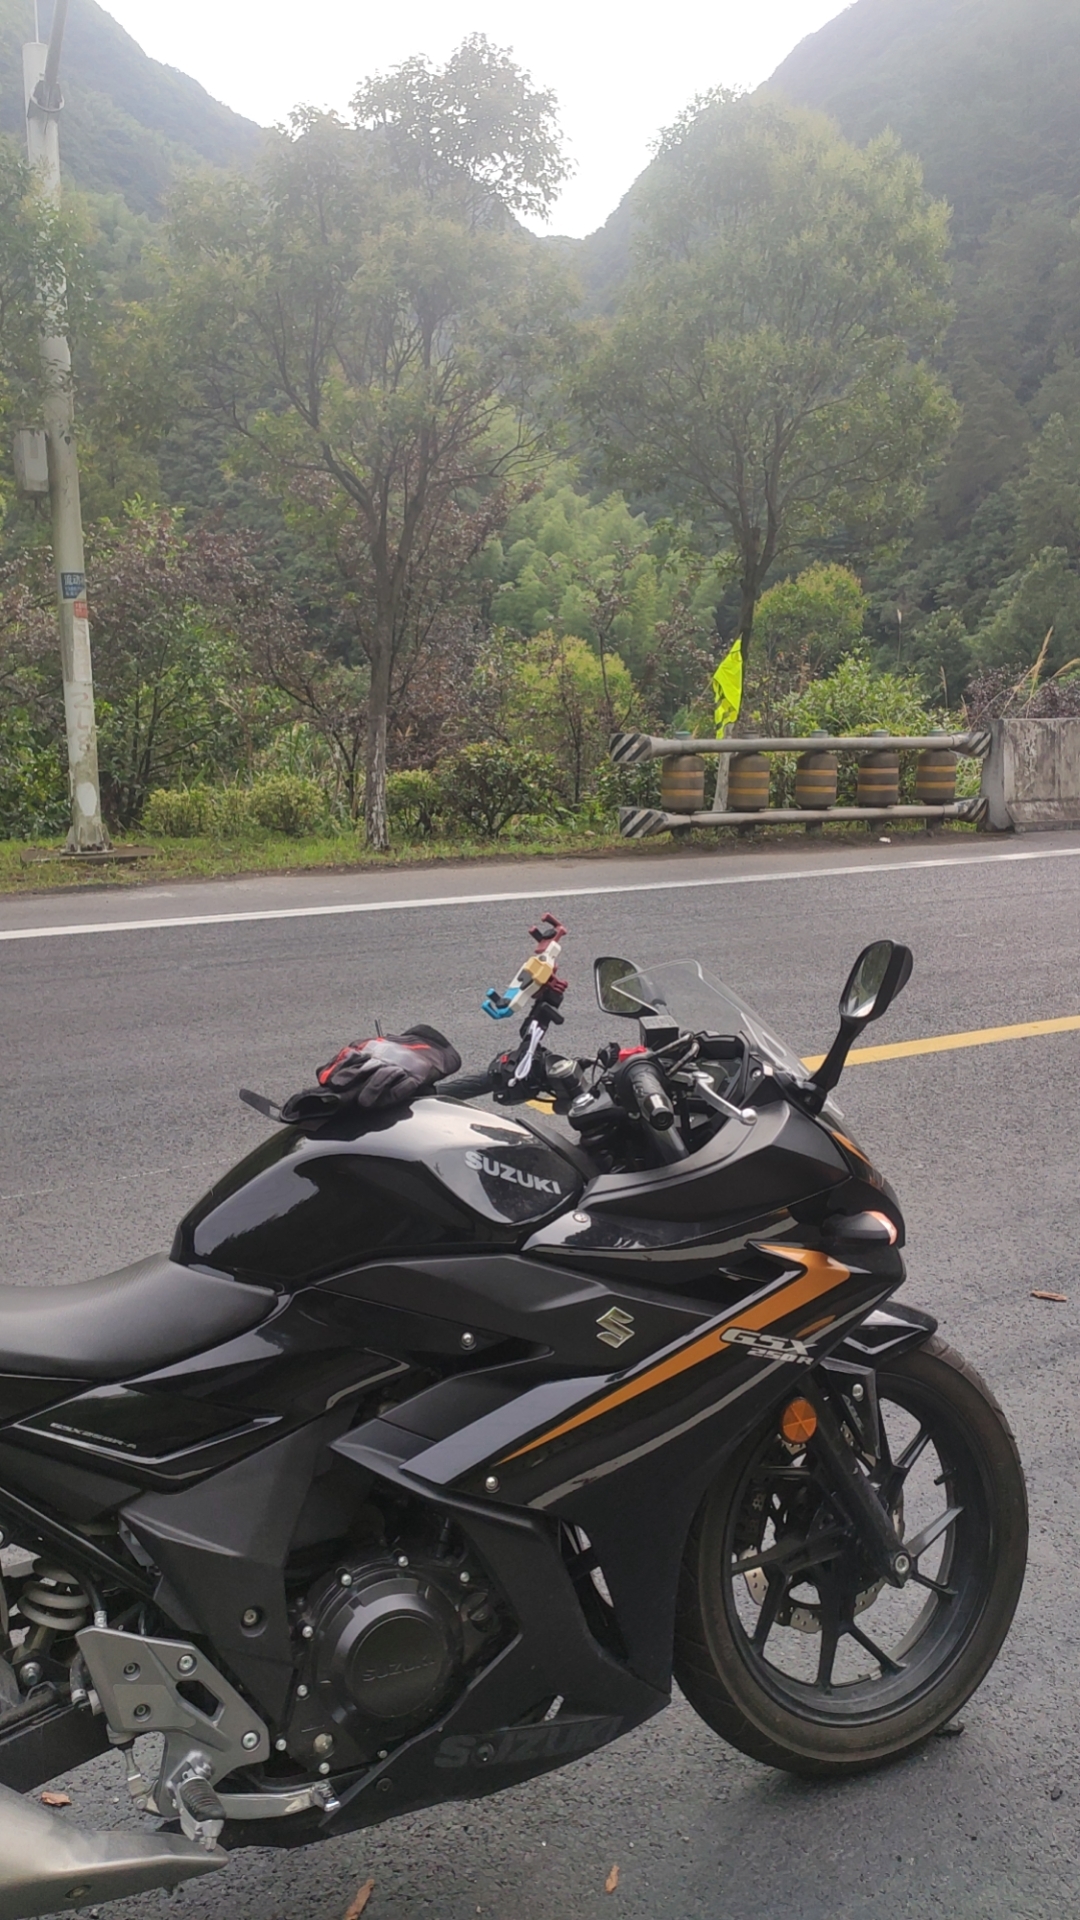
记·摩旅·回家

记于:2023-07-22 晚上
地点:浙江省·温州市
天气:阴雨

开销:
加油:76
总计:76

此次摩旅开销总计:189.8+215.71+259.40+76=740.91

早上应该是6点多出发的,走京福线/104国道,下午4点多到家;
早上就吃了一根玉米香肠,中午没吃,开到下午一共9个多小时,400公里左右,第一次开这么远,突然感觉自己好牛逼,就是肩背和腰部痛的不行,都有点想换车了;
今天实实在在体验了把什么叫缺德导航,开到台州,剩余路程一直停留在181km,导航的路线不知对不对,重新导航都没用,最后连导航记录都没保存,淦;
后面的路程用的是百度导航;
好像是在台州,有一长段桥上的路很好开,一个个九十上百的速度,一度以为自己是不是不小心上了高速~;
今天感觉差点要撞了,记得应该是在冲最后几秒绿灯,见左边一辆超级大卡车准备掉头,我还特意按了几声喇叭,按照以往经验,这种大块头肯定是要等一等的,所以我也基本没减速,几乎是刚过路口,反应过来,这厮居然在掉头,几乎同一时间,右边一辆轿车飞速驶来准备要右转,但是这速度对于转弯来说有点快了,我整个人都震惊恍惚了一下,感觉肾上腺都分泌出来了,一拧油门就从三五米宽的中间冲过去了,然后就是有些后怕了,看了下后视镜,这两个卧龙凤雏好像也刹停了,为什么不撞起来呢~想骂人;
开车还是要小心,不过话虽如此,即便自己猥琐着开,比如不冲绿灯,但是在路上久了出状况的概率肯定也是越来越大的,特别是骑摩托,毕竟肉包铁,除了小心慢慢开和穿护具之外,剩下的真就是看运气了~;
当时的一瞬间,脑海里有闪过自己飞出去的画面,而且是穿护具的,难道是因为穿了护具,所以潜意识里想飞一次?~;
还有件事想不起来了,可能是昨晚睡觉时蟑螂爬我手上,我被吓得从床上弹起来这件事~;
第一次的摩旅就结束了,有机会继续。


记·摩旅·游玩

记于:2023-07-21 晚上
地点:浙江省·杭州市·萧山区·凤盛大酒店
天气:阴雨

开销:
住宿:92
公交地铁:3+3+6+2+2+6+8+3
充电宝:3+12
午餐:17.90
西湖游船:70
晚餐:29.50
买水:2
总计:259.40

早上8点出发,下午6点左右回来;上午去下沙,下午去西湖;
上午坐第一趟公交就坐反了,还好发现及时,两三站下车了~;
到了下沙,只是去杭职和计量门口拍了个照,不让进;
中午开了个工作会议,然后在便利店吃了份快餐;
下午去了西湖,70块钱买票坐了游船到湖中的岛,没啥好玩的,随便逛了逛,拍了点照就回岸上了;
西湖边的充电宝价格太贵了,比景点外的贵了一倍,一个半多小时花了12块钱;
晚上吃麻辣烫点多了,有点撑~
不知道为什么,晚上头有点痛,今天阴雨天,而且基本上都在坐车,不至于中暑,难道新冠?~
把最后一瓶藿香正气液喝掉了;
明天回家,挑战看看一天时间直接开到家。


杭州西湖

记·摩旅·到达杭州

记于:2023-07-20 晚上
地点:浙江省·杭州市·萧山区·凤盛大酒店
天气:阴雨

开销:
午餐:17
加油:76.41
住宿:92
晚餐:26.30
买水:4
总计:215.71

中午12点前出发,走351国道,下午3点多到达杭州萧山区,下午4点左右到达萧山区凤盛大酒店;
全程150公里左右(可能有几十公里误差~);
刚开出去没多久就大下雨,鞋子都湿了;
351国道真好开,车少,想试试拉个极速,到110的时候又怕死亡摇摆,赶紧松了油门~;
在杭州开,多次开错路,怕开到禁行区被罚,多次纠正路线,还好最终没事;
路上遇到一个叼毛翘头,没翻车真可惜~;
明天去一趟西湖、去一趟杭职。


路边躲雨

记·摩旅·去杭州

记于:2023-07-19 晚上
地点:浙江省·金华市·磐安县·永加宾馆
天气:阴、多云

开销:
加油:76.73
住宿:92.07
晚餐:17
买水:4
总计:189.8

凌晨1点睡,早上5点醒,6点起,头有点疼,吃完早餐继续睡到中午;
家里吃过午饭,下午1点启程,走223省道,从温州经过台州,下午6点左右到达到达金华磐安县;
中途一路段大雨;
明天继续去往杭州。


开不动了休息下

Kubernetes安装

1.环境#

1
2
3
4
5
6
7
8
192.168.31.211 - vhost1 - 控制节点
192.168.31.212 - vhost2 - 工作节点
192.168.31.213 - vhost3 - 工作节点
192.168.31.208 - test - 本地镜像仓库

操作系统:CentOS7 Linux

Kubernetes版本:v1.26.0

2 安装docker registry本地镜像仓库#

由于官方镜像地址在国内访问不了,需要搭建本地镜像仓库,从网上找寻相关镜像文件下载并导入(见尾部 5.资源)

主机:test

1
# docker run --restart=always -d -p 15000:5000 -v /var/lib/registry:/var/lib/registry registry

配置http访问(即不需要https)

1
# cat /etc/docker/daemon.json
1
2
3
4
5
6
7
8
9
{
"registry-mirrors" : [
"https://cr.console.aliyun.com/"
],
# 这段
"insecure-registries": [
"192.168.31.208:15000"
]
}

3.集群主机配置及所需软件安装#

主机:vhost1, vhost2, vhost3

3.1 配置先决条件#

1
2
3
4
5
6
7
# cat <<EOF | sudo tee /etc/modules-load.d/k8s.conf
overlay
br_netfilter
EOF

# sudo modprobe overlay
# sudo modprobe br_netfilter

设置所需的 sysctl 参数,参数在重新启动后保持不变

1
2
3
4
5
# cat <<EOF | sudo tee /etc/sysctl.d/k8s.conf
net.bridge.bridge-nf-call-iptables = 1
net.bridge.bridge-nf-call-ip6tables = 1
net.ipv4.ip_forward = 1
EOF

应用 sysctl 参数而不重新启动

1
sudo sysctl --system

3.2 安装kubeadm, kubectl, kubelet#

1
2
3
4
5
6
7
8
9
10
11
12
13
# cat <<EOF > /etc/yum.repos.d/kubernetes.repo
[kubernetes]
name=Kubernetes
baseurl=https://mirrors.aliyun.com/kubernetes/yum/repos/kubernetes-el7-x86_64/
enabled=1
gpgcheck=1
repo_gpgcheck=1
gpgkey=https://mirrors.aliyun.com/kubernetes/yum/doc/yum-key.gpg https://mirrors.aliyun.com/kubernetes/yum/doc/rpm-package-key.gpg
EOF

# setenforce 0
# yum install -y kubelet kubeadm kubectl
# systemctl enable kubelet && systemctl start kubelet

3.3 安装containerd#

3.3.1 下载并安装containerd#

1
2
3
4
# tar Cxzvf /usr/local containerd-1.6.15-linux-amd64.tar.gz
# cp containerd.service /usr/lib/systemd/system/containerd.service
# systemctl daemon-reload
# systemctl enable --now containerd

3.3.2 下载并安装runc#

1
# install -m 755 runc.amd64 /usr/local/sbin/runc

3.3.3 验证#

1
2
# ctr container list
# crictl ps

如果出现如下错误信息

1
2
3
4
5
WARN[0000] runtime connect using default endpoints: [unix:///var/run/dockershim.sock unix:///run/containerd/containerd.sock unix:///run/crio/crio.sock unix:///var/run/cri-dockerd.sock]. As the default settings are now deprecated, you should set the endpoint instead. 
ERRO[0000] unable to determine runtime API version: rpc error: code = Unavailable desc = connection error: desc = "transport: Error while dialing dial unix /var/run/dockershim.sock: connect: no such file or directory"
WARN[0000] image connect using default endpoints: [unix:///var/run/dockershim.sock unix:///run/containerd/containerd.sock unix:///run/crio/crio.sock unix:///var/run/cri-dockerd.sock]. As the default settings are now deprecated, you should set the endpoint instead.
ERRO[0000] unable to determine image API version: rpc error: code = Unavailable desc = connection error: desc = "transport: Error while dialing dial unix /var/run/dockershim.sock: connect: no such file or directory"
CONTAINER IMAGE CREATED STATE NAME ATTEMPT POD ID POD

执行修复

1
2
# crictl config runtime-endpoint unix:///run/containerd/containerd.sock
# crictl config image-endpoint unix:///run/containerd/containerd.sock

3.3.4 下载并安装CNI插件#

1
2
# mkdir -p /opt/cni/bin
# tar Cxzvf /opt/cni/bin cni-plugins-linux-amd64-v1.1.1.tgz

3.3.5 配置systemd cgroup驱动#

1
2
# mkdir /etc/containerd
# containerd config default > /etc/containerd/config.toml
1
# vim /etc/containerd/config.toml # 修改如下
1
2
3
4
[plugins."io.containerd.grpc.v1.cri".containerd.runtimes.runc]
...
[plugins."io.containerd.grpc.v1.cri".containerd.runtimes.runc.options]
SystemdCgroup = true

3.3.6 修改沙窗(pause)镜像地址#

1
# vim /etc/containerd/config.toml # 修改如下
1
2
[plugins."io.containerd.grpc.v1.cri"]
sandbox_image = "registry.aliyuncs.com/google_containers/pause:3.2"

3.3.7 配置containerd使用http#

1
# vim /etc/containerd/config.toml # 修改如下
1
2
3
4
5
6
7
8
9
10
11
12
13
14
15
16
[plugins."io.containerd.grpc.v1.cri".registry]
config_path = ""

[plugins."io.containerd.grpc.v1.cri".registry.auths]

[plugins."io.containerd.grpc.v1.cri".registry.mirrors]
# 这段
[plugins."io.containerd.grpc.v1.cri".registry.mirrors."192.168.31.208:15000"]
endpoint = ["http://192.168.31.208:15000"]

[plugins."io.containerd.grpc.v1.cri".registry.configs]
# 这段
[plugins."io.containerd.grpc.v1.cri".registry.configs."192.168.31.208:15000".tls]
insecure_skip_verify = true

[plugins."io.containerd.grpc.v1.cri".registry.headers]

3.3.8 重启containerd#

1
# systemctl restart containerd

4.启动集群#

4.1 使用kubeadm初始化集群#

主机:vhost1

1
# kubeadm init --image-repository=registry.aliyuncs.com/google_containers
1
2
3
4
5
6
7
8
9
10
11
12
13
14
15
16
17
18
19
20
21
22
23
24
25
26
27
28
29
30
31
32
33
34
35
36
37
38
39
40
41
42
43
44
45
46
47
48
49
50
51
52
53
54
55
56
57
58
59
60
61
62
63
64
65
66
67
68
69
70
71
72
[init] Using Kubernetes version: v1.26.0
[preflight] Running pre-flight checks
[preflight] Pulling images required for setting up a Kubernetes cluster
[preflight] This might take a minute or two, depending on the speed of your internet connection
[preflight] You can also perform this action in beforehand using 'kubeadm config images pull'
[certs] Using certificateDir folder "/etc/kubernetes/pki"
[certs] Generating "ca" certificate and key
[certs] Generating "apiserver" certificate and key
[certs] apiserver serving cert is signed for DNS names [kubernetes kubernetes.default kubernetes.default.svc kubernetes.default.svc.cluster.local vhost1] and IPs [10.96.0.1 192.168.31.211]
[certs] Generating "apiserver-kubelet-client" certificate and key
[certs] Generating "front-proxy-ca" certificate and key
[certs] Generating "front-proxy-client" certificate and key
[certs] Generating "etcd/ca" certificate and key
[certs] Generating "etcd/server" certificate and key
[certs] etcd/server serving cert is signed for DNS names [localhost vhost1] and IPs [192.168.31.211 127.0.0.1 ::1]
[certs] Generating "etcd/peer" certificate and key
[certs] etcd/peer serving cert is signed for DNS names [localhost vhost1] and IPs [192.168.31.211 127.0.0.1 ::1]
[certs] Generating "etcd/healthcheck-client" certificate and key
[certs] Generating "apiserver-etcd-client" certificate and key
[certs] Generating "sa" key and public key
[kubeconfig] Using kubeconfig folder "/etc/kubernetes"
[kubeconfig] Writing "admin.conf" kubeconfig file
[kubeconfig] Writing "kubelet.conf" kubeconfig file
[kubeconfig] Writing "controller-manager.conf" kubeconfig file
[kubeconfig] Writing "scheduler.conf" kubeconfig file
[kubelet-start] Writing kubelet environment file with flags to file "/var/lib/kubelet/kubeadm-flags.env"
[kubelet-start] Writing kubelet configuration to file "/var/lib/kubelet/config.yaml"
[kubelet-start] Starting the kubelet
[control-plane] Using manifest folder "/etc/kubernetes/manifests"
[control-plane] Creating static Pod manifest for "kube-apiserver"
[control-plane] Creating static Pod manifest for "kube-controller-manager"
[control-plane] Creating static Pod manifest for "kube-scheduler"
[etcd] Creating static Pod manifest for local etcd in "/etc/kubernetes/manifests"
[wait-control-plane] Waiting for the kubelet to boot up the control plane as static Pods from directory "/etc/kubernetes/manifests". This can take up to 4m0s
[kubelet-check] Initial timeout of 40s passed.
[apiclient] All control plane components are healthy after 44.098707 seconds
[upload-config] Storing the configuration used in ConfigMap "kubeadm-config" in the "kube-system" Namespace
[kubelet] Creating a ConfigMap "kubelet-config" in namespace kube-system with the configuration for the kubelets in the cluster
[upload-certs] Skipping phase. Please see --upload-certs
[mark-control-plane] Marking the node vhost1 as control-plane by adding the labels: [node-role.kubernetes.io/control-plane node.kubernetes.io/exclude-from-external-load-balancers]
[mark-control-plane] Marking the node vhost1 as control-plane by adding the taints [node-role.kubernetes.io/control-plane:NoSchedule]
[bootstrap-token] Using token: 9pk20q.rk8jrrx5valnw0di
[bootstrap-token] Configuring bootstrap tokens, cluster-info ConfigMap, RBAC Roles
[bootstrap-token] Configured RBAC rules to allow Node Bootstrap tokens to get nodes
[bootstrap-token] Configured RBAC rules to allow Node Bootstrap tokens to post CSRs in order for nodes to get long term certificate credentials
[bootstrap-token] Configured RBAC rules to allow the csrapprover controller automatically approve CSRs from a Node Bootstrap Token
[bootstrap-token] Configured RBAC rules to allow certificate rotation for all node client certificates in the cluster
[bootstrap-token] Creating the "cluster-info" ConfigMap in the "kube-public" namespace
[kubelet-finalize] Updating "/etc/kubernetes/kubelet.conf" to point to a rotatable kubelet client certificate and key
[addons] Applied essential addon: CoreDNS
[addons] Applied essential addon: kube-proxy

Your Kubernetes control-plane has initialized successfully!

To start using your cluster, you need to run the following as a regular user:

mkdir -p $HOME/.kube
sudo cp -i /etc/kubernetes/admin.conf $HOME/.kube/config
sudo chown $(id -u):$(id -g) $HOME/.kube/config

Alternatively, if you are the root user, you can run:

export KUBECONFIG=/etc/kubernetes/admin.conf

You should now deploy a pod network to the cluster.
Run "kubectl apply -f [podnetwork].yaml" with one of the options listed at:
https://kubernetes.io/docs/concepts/cluster-administration/addons/

Then you can join any number of worker nodes by running the following on each as root:

kubeadm join 192.168.31.211:6443 --token 9pk20q.rk8jrrx5valnw0di \
--discovery-token-ca-cert-hash sha256:0c2746c2e25ebb8543c5e905454a54887562bafacf69465fc7a83d6159bf3a1c

4.2 安装Pod网络附加组件#

主机:vhost1

下载calico.yaml

1
2
# export KUBECONFIG=/etc/kubernetes/admin.conf
# kubectl apply -f calico.yaml

4.3 其他节点加入集群#

主机:vhost2, vhost3

1
# kubeadm join 192.168.31.211:6443 --token 9pk20q.rk8jrrx5valnw0di --discovery-token-ca-cert-hash sha256:0c2746c2e25ebb8543c5e905454a54887562bafacf69465fc7a83d6159bf3a1c
1
2
3
4
5
6
7
8
9
10
11
12
13
[preflight] Running pre-flight checks
[preflight] Reading configuration from the cluster...
[preflight] FYI: You can look at this config file with 'kubectl -n kube-system get cm kubeadm-config -o yaml'
[kubelet-start] Writing kubelet configuration to file "/var/lib/kubelet/config.yaml"
[kubelet-start] Writing kubelet environment file with flags to file "/var/lib/kubelet/kubeadm-flags.env"
[kubelet-start] Starting the kubelet
[kubelet-start] Waiting for the kubelet to perform the TLS Bootstrap...

This node has joined the cluster:
* Certificate signing request was sent to apiserver and a response was received.
* The Kubelet was informed of the new secure connection details.

Run 'kubectl get nodes' on the control-plane to see this node join the cluster.

4.4 验证及其他命令#

主机:vhost1

4.4.1 查询集群节点看是否启动成功#

1
# kubectl get nodes
1
2
3
4
NAME     STATUS   ROLES           AGE   VERSION
vhost1 Ready control-plane 19d v1.26.0
vhost2 Ready <none> 19d v1.26.0
vhost3 Ready <none> 19d v1.26.0

4.4.2 令牌相关#

1
# kubeadm token list

默认情况下,令牌会在 24 小时后过期。如果要在当前令牌过期后将节点加入集群, 则可以通过在控制平面节点上运行以下命令来创建新令牌:

1
# kubeadm token create

如果你没有 –discovery-token-ca-cert-hash 的值,则可以通过在控制平面节点上执行以下命令链来获取它:

1
# openssl x509 -pubkey -in /etc/kubernetes/pki/ca.crt | openssl rsa -pubin -outform der 2>/dev/null | openssl dgst -sha256 -hex | sed 's/^.* //'

4.4.3 重启集群#

1
2
3
4
5
6
7
8
# 重置
kubeadm reset

# 控制平面
kubeadm init ...

# 子节点
kubeadm join ...

5.资源#

6.资料#

Linux命令工具-awk-基础用法

1.简介#

模式扫描和处理的语言,一般可作为格式化工具。

2.命令格式#

awk [OPTIONS] 'script' file
awk [OPTIONS] -f scriptfile file

3.示例#

1
# cat data.txt
1
2
3
4
5
6
7
8
9
10
11
12
13
14
15
16
17
18
19
20
21
22
23
24
25
26
27
28
29
30
31
32
33
34
35
36
37
38
39
40
41
Proto Recv-Q Send-Q Local Address           Foreign Address         State       PID/Program name    
tcp 0 0 0.0.0.0:111 0.0.0.0:* LISTEN 777/rpcbind
tcp 0 0 0.0.0.0:80 0.0.0.0:* LISTEN 2497/nginx: master
tcp 0 0 0.0.0.0:22 0.0.0.0:* LISTEN 1075/sshd
tcp 0 0 127.0.0.1:25 0.0.0.0:* LISTEN 1409/master
tcp 0 0 127.0.0.1:17380 0.0.0.0:* LISTEN 2497/nginx: master
tcp 0 0 127.0.0.1:17400 0.0.0.0:* LISTEN 2497/nginx: master
tcp 0 0 127.0.0.1:17221 0.0.0.0:* LISTEN 2497/nginx: master
tcp 0 0 0.0.0.0:8888 0.0.0.0:* LISTEN 1133/tinyproxy
tcp 0 0 127.0.0.1:17131 0.0.0.0:* LISTEN 2497/nginx: master
tcp 0 0 0.0.0.0:9080 0.0.0.0:* LISTEN 2625/WorkerMan: mas
tcp 0 0 127.0.0.1:8899 0.0.0.0:* LISTEN 2497/nginx: master
tcp 0 0 127.0.0.1:17033 0.0.0.0:* LISTEN 2497/nginx: master
tcp 0 0 127.0.0.1:15640 0.0.0.0:* LISTEN 2497/nginx: master
tcp 0 0 127.0.0.1:15538 0.0.0.0:* LISTEN 2497/nginx: master
tcp 0 0 127.0.0.1:15445 0.0.0.0:* LISTEN 2497/nginx: master
tcp 0 0 0.0.0.0:8090 0.0.0.0:* LISTEN 1412/phpstudy
tcp 0 0 0.0.0.0:6379 0.0.0.0:* LISTEN 1080/redis-server *
tcp 0 0 127.0.0.1:15329 0.0.0.0:* LISTEN 2497/nginx: master
tcp 0 0 127.0.0.1:5538 0.0.0.0:* LISTEN 2478/php-fpm: maste
tcp 0 0 192.168.31.208:51704 192.168.31.221:9200 ESTABLISHED 1067/metricbeat
tcp 0 0 192.168.31.208:22 192.168.31.151:59684 ESTABLISHED 5894/sshd: root@pts
tcp 0 0 192.168.31.208:22 192.168.31.151:63547 ESTABLISHED 7573/sshd: root@pts
tcp 0 0 127.0.0.1:8090 127.0.0.1:55354 ESTABLISHED 1412/phpstudy
tcp 0 0 127.0.0.1:55354 127.0.0.1:8090 ESTABLISHED 1193/phpstudy
tcp6 0 0 ::1:25 :::* LISTEN 1409/master
tcp6 0 0 :::3306 :::* LISTEN 2433/mysqld
tcp6 0 0 :::111 :::* LISTEN 777/rpcbind
tcp6 0 0 :::22 :::* LISTEN 1075/sshd
tcp6 0 0 :::21 :::* LISTEN 1112/vsftpd
tcp6 0 0 :::9100 :::* LISTEN 764/node_exporter
tcp6 0 0 :::6379 :::* LISTEN 1080/redis-server *
tcp6 0 0 192.168.31.208:9100 192.168.31.222:35232 ESTABLISHED 764/node_exporter
udp 0 0 0.0.0.0:111 0.0.0.0:* 777/rpcbind
udp 0 0 127.0.0.1:323 0.0.0.0:* 824/chronyd
udp 0 0 0.0.0.0:935 0.0.0.0:* 777/rpcbind
udp 0 0 192.168.31.208:59713 111.230.189.174:123 ESTABLISHED 824/chronyd
udp6 0 0 :::111 :::* 777/rpcbind
udp6 0 0 ::1:323 :::* 824/chronyd
udp6 0 0 :::935 :::* 777/rpcbind
raw6 213504 0 :::58 :::* 7 805/NetworkManager

以上是文件原始内容


1
# awk '{print $1, $4, $5}' data.txt

该命令作用是打印第1、4、5列,包含标题(即不区分是否标题)

1
2
3
4
5
6
7
8
9
10
11
12
13
14
15
16
17
18
19
20
21
22
23
24
25
26
27
28
29
30
31
32
33
34
35
36
37
38
39
40
41
Proto Local Address
tcp 0.0.0.0:111 0.0.0.0:*
tcp 0.0.0.0:80 0.0.0.0:*
tcp 0.0.0.0:22 0.0.0.0:*
tcp 127.0.0.1:25 0.0.0.0:*
tcp 127.0.0.1:17380 0.0.0.0:*
tcp 127.0.0.1:17400 0.0.0.0:*
tcp 127.0.0.1:17221 0.0.0.0:*
tcp 0.0.0.0:8888 0.0.0.0:*
tcp 127.0.0.1:17131 0.0.0.0:*
tcp 0.0.0.0:9080 0.0.0.0:*
tcp 127.0.0.1:8899 0.0.0.0:*
tcp 127.0.0.1:17033 0.0.0.0:*
tcp 127.0.0.1:15640 0.0.0.0:*
tcp 127.0.0.1:15538 0.0.0.0:*
tcp 127.0.0.1:15445 0.0.0.0:*
tcp 0.0.0.0:8090 0.0.0.0:*
tcp 0.0.0.0:6379 0.0.0.0:*
tcp 127.0.0.1:15329 0.0.0.0:*
tcp 127.0.0.1:5538 0.0.0.0:*
tcp 192.168.31.208:51704 192.168.31.221:9200
tcp 192.168.31.208:22 192.168.31.151:59684
tcp 192.168.31.208:22 192.168.31.151:63547
tcp 127.0.0.1:8090 127.0.0.1:55354
tcp 127.0.0.1:55354 127.0.0.1:8090
tcp6 ::1:25 :::*
tcp6 :::3306 :::*
tcp6 :::111 :::*
tcp6 :::22 :::*
tcp6 :::21 :::*
tcp6 :::9100 :::*
tcp6 :::6379 :::*
tcp6 192.168.31.208:9100 192.168.31.222:35232
udp 0.0.0.0:111 0.0.0.0:*
udp 127.0.0.1:323 0.0.0.0:*
udp 0.0.0.0:935 0.0.0.0:*
udp 192.168.31.208:59713 111.230.189.174:123
udp6 :::111 :::*
udp6 ::1:323 :::*
udp6 :::935 :::*
raw6 :::58 :::*

1
# awk '{printf "%-10s %-22s %-32s \n", $1, $4, $5}' data.txt

该命令作用同上一条,只是进行了格式化

1
2
3
4
5
6
7
8
9
10
11
12
13
14
15
16
17
18
19
20
21
22
23
24
25
26
27
28
29
30
31
32
33
34
35
36
37
38
39
40
41
Proto      Local                  Address                          
tcp 0.0.0.0:111 0.0.0.0:*
tcp 0.0.0.0:80 0.0.0.0:*
tcp 0.0.0.0:22 0.0.0.0:*
tcp 127.0.0.1:25 0.0.0.0:*
tcp 127.0.0.1:17380 0.0.0.0:*
tcp 127.0.0.1:17400 0.0.0.0:*
tcp 127.0.0.1:17221 0.0.0.0:*
tcp 0.0.0.0:8888 0.0.0.0:*
tcp 127.0.0.1:17131 0.0.0.0:*
tcp 0.0.0.0:9080 0.0.0.0:*
tcp 127.0.0.1:8899 0.0.0.0:*
tcp 127.0.0.1:17033 0.0.0.0:*
tcp 127.0.0.1:15640 0.0.0.0:*
tcp 127.0.0.1:15538 0.0.0.0:*
tcp 127.0.0.1:15445 0.0.0.0:*
tcp 0.0.0.0:8090 0.0.0.0:*
tcp 0.0.0.0:6379 0.0.0.0:*
tcp 127.0.0.1:15329 0.0.0.0:*
tcp 127.0.0.1:5538 0.0.0.0:*
tcp 192.168.31.208:51704 192.168.31.221:9200
tcp 192.168.31.208:22 192.168.31.151:59684
tcp 192.168.31.208:22 192.168.31.151:63547
tcp 127.0.0.1:8090 127.0.0.1:55354
tcp 127.0.0.1:55354 127.0.0.1:8090
tcp6 ::1:25 :::*
tcp6 :::3306 :::*
tcp6 :::111 :::*
tcp6 :::22 :::*
tcp6 :::21 :::*
tcp6 :::9100 :::*
tcp6 :::6379 :::*
tcp6 192.168.31.208:9100 192.168.31.222:35232
udp 0.0.0.0:111 0.0.0.0:*
udp 127.0.0.1:323 0.0.0.0:*
udp 0.0.0.0:935 0.0.0.0:*
udp 192.168.31.208:59713 111.230.189.174:123
udp6 :::111 :::*
udp6 ::1:323 :::*
udp6 :::935 :::*
raw6 :::58 :::*

不打印标题(即不打印第一行)

1
# awk 'NR!=1 {printf "%-10s %-22s %-32s \n", $1, $4, $5}' data.txt

内置变量

1
2
3
4
5
6
7
8
9
10
$0          当前记录(这个变量中存放着整个行的内容)
$1~$n 当前记录的第n个字段,字段间由FS分隔
FS 输入字段分隔符 默认是空格或Tab
NF 当前记录中的字段个数,就是有多少列
NR 已经读出的记录数,就是行号,从1开始,如果有多个文件话,这个值也是不断累加中。
FNR 当前记录数,与NR不同的是,这个值会是各个文件自己的行号
RS 输入的记录分隔符, 默认为换行符
OFS 输出字段分隔符, 默认也是空格
ORS 输出的记录分隔符,默认为换行符
FILENAME 当前输入文件的名字

1
# awk '$1=="tcp" && $6=="ESTABLISHED" || NR==1 {printf "%-10s %-22s %-22s %-16s %-30s \n", $1, $4, $5, $6, $7}' data.txt

该命令作用为,匹配第1列为”tcp”,并且第6列为”ESTABLISHED”,或者行号为1的行(即包含标题),然后进行格式化输出

1
2
3
4
5
6
Proto      Local                  Address                Foreign          Address                        
tcp 192.168.31.208:51704 192.168.31.221:9200 ESTABLISHED 1067/metricbeat
tcp 192.168.31.208:22 192.168.31.151:59684 ESTABLISHED 5894/sshd:
tcp 192.168.31.208:22 192.168.31.151:63547 ESTABLISHED 7573/sshd:
tcp 127.0.0.1:8090 127.0.0.1:55354 ESTABLISHED 1412/phpstudy
tcp 127.0.0.1:55354 127.0.0.1:8090 ESTABLISHED 1193/phpstudy

高级用法和原理见资料

4.资料#

Linux命令工具-sed-基础用法

1.简介#

一个非交互式、面向文本流的编辑器,能对文本进行匹配、过滤和转换

2.命令格式#

sed [OPTION]... {script-only-if-no-other-script} [input-file]...

3.示例#

1
# cat data.txt
1
2
unix macos macos unix unix unix windows windows unix unix
unix unix unix unix unix unix unix unix unix unix

以上是文件原始内容


1
# sed 's/unix/linux/g' data.txt

该命令作用是使用指令s(格式为:s/pattern/replacement/flags)匹配每行的unix,将其替换为linux,g表示对每行的所有匹配进行替换,输出如下:

1
2
linux macos macos linux linux linux windows windows linux linux
linux linux linux linux linux linux linux linux linux linux

上一个例子的操作不会影响到原文件,只是默认进行打印输出

1
# sed -i 's/unix/linux/g' data.txt

该命令添加了-i选项,表示直接对原文件进行操作

1
# sed -i.bak 's/unix/linux/g' data.txt

该命令添加了-i并且紧跟.bak(可以是其他任意字符串作为后缀比如temp、-save等),这会使得产生一个相应名字的备份文件,并对源文件进行操作

1
# ls -l
1
2
data.txt
data.txt.bak

1
# cat data.txt
1
2
unix macos macos unix unix unix windows windows unix unix
unix unix unix unix unix unix unix unix unix unix
1
# sed '/macos/p' data.txt
1
2
3
unix macos macos unix unix unix windows windows unix unix
unix unix unix unix unix unix unix unix unix unix

该命令会将存在匹配(macos)的行进行打印(p)
这里输出了3行,第1行是原始第1行,第2行是由于第1行的匹配进行的打印输出,第3行为原始第3行
可以指定-n选项抑制原始行数据的打印,如下:

1
# sed -n '/macos/p' data.txt
1
unix macos macos unix unix unix windows windows unix unix

1
# cat data.txt
1
2
unix macos macos unix unix unix windows windows unix unix
unix unix unix unix unix unix unix unix unix unix
1
# sed '2d' data.txt

该命令将指定的第2行进行删除操作,输入如下:

1
unix macos macos unix unix unix windows windows unix unix

4.资料#

Linux命令工具-find

1.简介#

能够在多层级目录中递归查找文件的工具

2.命令格式#

find [path...] [expression]

[path] - 指定递归查找的根目录(默认当前目录)
[expression] 可以由3部分组成:
options - 选项(相当于全局配置)
tests - 测试(即判断指定条件是否满足)
actions - 动作(即找到符合条件的文件之后,对每个文件进行的操作)(默认-print)

3.示例#

find . -mindepth 2 -name '*.txt' -size +1M -exec ls -sailh {} \;

path: .
expression.options: -mindepth 2
expression.tests: -name '*.txt' -size +1M
expression.actions: -exec ls -sailh {} \;

{} 表示查找到的每个文件, \; 表示 -exec 的结束

该示例表示的意思是,从当前目录开始递归查找,文件路径最小深度为2(即>=2),文件名以 .txt 结尾,并且文件大小大于1M,查找完之后的动作为使用 ls -sailh 命令将其展示出来

4.资料#

  • linux man find